donnamonna
Member
- Joined
- Jan 15, 2010
- Messages
- 242
A couple of things to go over before we begin: This will not allow you to run HB/GB natively in Linux! What this does allow you to do is to run HB/GB “on top” of Linux through virtualization. The benefits of this are that you can essentially run it without having to partition your hard drive and dual boot with some version of Windows. Also, while you are running HB/GB and wow on your virtualized OS desktop you can still work actively in your Linux OS. There are a few things you will need in order to be able to do this.
Okay, assuming you have all of those things and the willingness to dive in lets get this party started!
Step 1: Installing VMware Player
First things first, download the latest release of Vmware Player and then open up a terminal window inside of Linux and use the 'cd' command to navigate to the directory to where you downloaded VMware Player. For Ubuntu users the default download directory is /home/<username>/Downloads.
hit enter, next type;
Hit enter again. Now take a look and make sure you can see the downloaded VMware Player bundle. It should be named something like; VMware-Player-3.0.1-227600.i386.bundle
Now type
Hit enter. You will have to enter your password and then wait for everything to install. Press 'y' and hit enter if prompted to do so. Once that is installed type;
Hit enter. After that installs type;
Hit enter. After that command is entered the VMware installer will extract and open which will look like this:

Click on 'Install” and wait for the installer to do its thing. After a few minutes it should complete with the message that installation was successful. If it doesn't you may need to go back to the beginning and repeat these steps, or take a look on-line and see if there are any specific installation tips for your particular brand of linux.
Step 2: Installing Windows XP in VMware Player
The first thing we need to do here is open up our newly installed VMware Player. For Ubuntu users it can be found in the menu under Applications → System Tools → VMware Player. For Kubuntu users it's Applications → System → VMware Player. Open it up and take a look. It should look like this:

Note: Another way to open Vmware Player that is not distribution specific is to type;
at the shell prompt in a terminal and hit enter.
Select the option to Create a New Virtual Machine which opens up the New Virtual Machine Wizard. There a few different options here. You can choose to install windows directly from the cdrom or you can choose to install it from an image file (.iso) Personally I choose the image file method because it's faster but either one will work for you. If you chose the image file method use the browse option to point VMware at the correct .iso file. If using a cdrom make sure VMware is looking at the correct device and that the Windows installation disc has been loaded up into it. After you've selected your method hit Next.

This opens up the easy install window which allows you to enter your Product key and name so that Vmware enters it for you automatically during set-up. You do not have to enter the product key at this time if you wish but I chose to do so. After you enter it (or don't) hit next. If you did not enter a key Vmware will nag you, warning that it might ask for the key later, just accept it and move on. The next screen allows you to name your virtual machine and decide where to store it. I left everything to the default settings which were these:

Next you will be prompted to enter the disk size. I chose 40GB because I have the room. But ideally you should only need about 20GB to be able to install everything you'll need to run the game and GB/HB. Enter your desired disk size and click Next. The screen should look like this:

One last step before we go. Leaving the memory at 512 should be acceptable, but if you have the extra memory to spare go ahead and choose to Customize Hardware at this point and boost the memory up a little bit. In my case I chose to boost it to 1024MB. Leave the rest of the settings at their default values for now. Leave the box checked for automatically powering on the virtual machine after creation, load up your CD of Windows XP if you chose to install via cdrom and hit Finish. Your set-up of Windows XP should begin automatically and VMware should begin downloading VMware Tools for your particular version of Windows. The install takes a while, even if you chose to install from an image file, so go get a drink and a snack and then come back once the installation is complete.
Step 3: A little housekeeping and installing WoW
After Windows gets through with its install VMware will begin to install VMware Tools automatically. After that finishes the virtual machine will restart and its time to make sure we can proceed on to the final steps by checking a few things out. Inside of your virtual machine open up an Internet Explorer window and make sure you can successfully connect to the Internet though it. If you left the network option set to the default which is NAT you should be able to connect just fine.
Before you go any further now is the time to make sure you DO NOT INSTALL ANY UPDATES! So make sure that Automatic updates are turned off. There are unspecified updates out there that tend to break Windows XP's ability to run WoW and HB/GB inside a Virtual Machine. Grab only the updates and files to install that I have listed here for the best chance to get everything running correctly.
First we need to grab the updated Microsoft Installer 3.1 which can be found by navigating Internet Explorer inside your virtual machine to: http://www.microsoft.com/downloads/details.aspx?FamilyID=889482fc-5f56-4a38-b838-de776fd4138c&displaylang=en Scroll down the page a bit to find the download link for the file we need which is WindowsInstaller-KB893803-v2-x86.exe. Download and Install this following the prompts as they appear on your screen. Once it completes click finish and your virtual machine will reboot.

Now, after rebooting go to Start --> Run and type "dxdiag" without the quotation marks and hit enter. This will open the DirectX diagnostic tool. Select no when it asks you for WQHL testing. Take a look at the window and check you version of DirectX. It should be listed towards the bottom of the page.

If your version is DirectX 9.0c you are all set. If your version is less you will need to upgrade to 9.0c which can be installed via redistributable here.
Once your DirectX version is up to 9.0c you will need to run a few tests to verify that the guest OS can run d3d from it's end. To do this reopen the dxdiag utility and click on the Display tab at the top once it opens. The window you get should look like this:

Make sure that DirectDraw Acceleration and Direct3D Acceleration are enabled under DirectX features. Also make sure it says "No problems found" down in the Notes section. This is also a good time to test DirectDraw and Direct3D by clicking on their respective test buttons.
Next with your Internet Explorer open navigate to: http://www.microsoft.com/downloads/details.aspx?FamilyId=333325FD-AE52-4E35-B531-508D977D32A6&displaylang=en This is the download page for .NET Framework 3.5 which is needed to run both Honorbuddy and Gatherbuddy. Click on download and wait for it to install. This will take a little time. You can choose to either Download the program and double click it, or just select Run instead of downloading it and it will begin to install automatically after downloading the set-up files it needs. Approximately 60MB worth.

Now comes the fun part. We need to install World of Warcraft onto our virtual machine. You can do this a number of different ways. It works the same as a basic Windows XP install, meaning you can either use the disks and let the patching fun commence, or you can use the PC client installer from Blizzard's website. Or you can migrate a working installation directory from a computer that has one via removable USB drive. I choose the last method because it is the quickest. It still takes around 20+ minutes but it works. No matter how you choose to install WoW just make sure it is installed. It should go off without a hitch.

After the WoW client is installed you will need to download and install HB or GB whichever you use, or both if you use them both. Install them as normal. Then start up your WoW client and your Buddy program of choice. You are now Buddying virtualized! You can minimize out of Vmware and use Linux normally. Wow and HB/GB will run just fine in the background, only a button press away should you need to check on them.


Have fun and make lots of gold! If this tutorial helped you please feel free to tell me so or bump my rep. Any suggestions or recommended additions to this tutorial should be sent to me via PM
Troubleshooting and FAQ:
Q: WoW will not run for me at all! Help!
A: With Vmware Player open and your virtual machine stopped, go to the menu bar and select VM → Settings. Under the Hardware tab select Display and take a look at the options to the right. The box at the very top for 3D Graphics needs to be checked. If this option is grayed out or unavailable then 3D is either not available for your particular video card or you forgot to install Vmware tools.
Q: WoW barely runs on my virtual machine. What do I need to do to make it run better?
A: Well, if upgrading your system is not an immediate option then I recommend setting all your WoW graphics options to their lowest possible setting. Also make sure you are running it in windowed mode and continue to shrink the window until performance improves. Remember that you don't need flawless performance for GB/HB to do it's thing. You just need a good Internet connection and enough RAM to allow the game to run smoothly enough for GB/HB to interact with it.
Q: I thought you said this tutorial was for how to run GB/HB and WoW under Linux, yet I still need to install Windows. What gives?
A: Right now there is not enough support to run GB/HB and WoW natively in Linux. Eventually we'll get there, either with Wine or Mono or a mixture of the two. But given the infrastructure that WoW and GB/HB need to be able to run this is the only way currently to run them under Linux without having to dual boot. If your system can support it then this is the best and only option available for now.
Q: Honorbuddy takes a loooong time to load. Is this normal?
A: Unfortunately, yes it is. Your poor CPU is trying to juggle running your main OS, a virtual OS, WoW with d3d virtualized, and then starting HB on top of all that. It's doing a lot! Have patience, it will load eventually. After the initial load things run much smoother.
Q: My mouse behaves erratically whenever I try to manually change my camera view in game. How do I fix it?
A: As of now, I don't know of any way to change that. It has something to do with how VMware's mouse driver interacts with the host OS. But it is unimportant. The important thing is that HB/GB uses the VMware mouse with no trouble, so automation of your character works just fine. If you're looking to manually play the game then virtualization is not the way to go anyway. For playing the game you should have a copy of WoW installed through wine or another Windows emulator on your Linux OS. This set-up is only to allow GB/HB to do it's thing.
- A lot of memory. The more the merrier. I would recommend having at least 2GB but you may be able to squeak by with 1GB, however you will probably notice extreme slowness on your system if you attempt this with less than 2GB.
- A Linux OS. This tutorial was done using the latest stable release of Kubuntu 9.10 Karmic Koala
- You will need a video card capable of rendering D3D graphics. I recommend having an Nvidia or ATI card. The drivers are unimportant because the D3D rendering is done through VMware's virtual driver but it is important to have a card that can handle the strain. There may be an issue with certain integrated graphics controllers from the Intel family not being up to it, but the only way to know for sure is to try it out.
- You will need the latest version of VMware Player which can be downloaded here. Make sure you download the .bundle version and not the .rpm version! You will be required to register in order to receive a download link via email but the program itself is free. At the time of this tutorial the current version of VMware Player is 3.0
- You will need a copy of Windows, preferably Windows XP since that is what this tutorial is based on. If you do not have a “legal” copy of Windows XP I cannot help you. Finding pirated software goes beyond the scope of this tutorial, but it is out there if you know where to look.
- Once you have your Virtual Machine installed you will need the latest version of GB/HB which can be downloaded here. Wait until your virtual machine is running and can connect to the Internet before downloading these because they need to be installed on it. At the time of this tutorial the current version of HB is1.247 and the current version of GB is 1.586
- And, of course, you will need a copy of the WoW client program. There are a couple of different ways to install it but we'll cover that a bit more later.
Okay, assuming you have all of those things and the willingness to dive in lets get this party started!
Step 1: Installing VMware Player
First things first, download the latest release of Vmware Player and then open up a terminal window inside of Linux and use the 'cd' command to navigate to the directory to where you downloaded VMware Player. For Ubuntu users the default download directory is /home/<username>/Downloads.
Code:
cd /home/<username>/Downloads
Code:
lsNow type
Code:
sudo aptitude install build-essential linux-kernel-headers
Code:
sudo apt-get install gksu
Code:
gksudo bash ./VMware-Player-3.0.1-227600.i386.bundle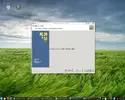
Click on 'Install” and wait for the installer to do its thing. After a few minutes it should complete with the message that installation was successful. If it doesn't you may need to go back to the beginning and repeat these steps, or take a look on-line and see if there are any specific installation tips for your particular brand of linux.
Step 2: Installing Windows XP in VMware Player
The first thing we need to do here is open up our newly installed VMware Player. For Ubuntu users it can be found in the menu under Applications → System Tools → VMware Player. For Kubuntu users it's Applications → System → VMware Player. Open it up and take a look. It should look like this:
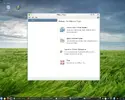
Note: Another way to open Vmware Player that is not distribution specific is to type;
Code:
vmplayerSelect the option to Create a New Virtual Machine which opens up the New Virtual Machine Wizard. There a few different options here. You can choose to install windows directly from the cdrom or you can choose to install it from an image file (.iso) Personally I choose the image file method because it's faster but either one will work for you. If you chose the image file method use the browse option to point VMware at the correct .iso file. If using a cdrom make sure VMware is looking at the correct device and that the Windows installation disc has been loaded up into it. After you've selected your method hit Next.
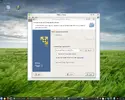
This opens up the easy install window which allows you to enter your Product key and name so that Vmware enters it for you automatically during set-up. You do not have to enter the product key at this time if you wish but I chose to do so. After you enter it (or don't) hit next. If you did not enter a key Vmware will nag you, warning that it might ask for the key later, just accept it and move on. The next screen allows you to name your virtual machine and decide where to store it. I left everything to the default settings which were these:
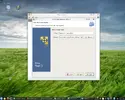
Next you will be prompted to enter the disk size. I chose 40GB because I have the room. But ideally you should only need about 20GB to be able to install everything you'll need to run the game and GB/HB. Enter your desired disk size and click Next. The screen should look like this:
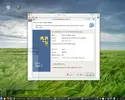
One last step before we go. Leaving the memory at 512 should be acceptable, but if you have the extra memory to spare go ahead and choose to Customize Hardware at this point and boost the memory up a little bit. In my case I chose to boost it to 1024MB. Leave the rest of the settings at their default values for now. Leave the box checked for automatically powering on the virtual machine after creation, load up your CD of Windows XP if you chose to install via cdrom and hit Finish. Your set-up of Windows XP should begin automatically and VMware should begin downloading VMware Tools for your particular version of Windows. The install takes a while, even if you chose to install from an image file, so go get a drink and a snack and then come back once the installation is complete.
Step 3: A little housekeeping and installing WoW
After Windows gets through with its install VMware will begin to install VMware Tools automatically. After that finishes the virtual machine will restart and its time to make sure we can proceed on to the final steps by checking a few things out. Inside of your virtual machine open up an Internet Explorer window and make sure you can successfully connect to the Internet though it. If you left the network option set to the default which is NAT you should be able to connect just fine.
Before you go any further now is the time to make sure you DO NOT INSTALL ANY UPDATES! So make sure that Automatic updates are turned off. There are unspecified updates out there that tend to break Windows XP's ability to run WoW and HB/GB inside a Virtual Machine. Grab only the updates and files to install that I have listed here for the best chance to get everything running correctly.
First we need to grab the updated Microsoft Installer 3.1 which can be found by navigating Internet Explorer inside your virtual machine to: http://www.microsoft.com/downloads/details.aspx?FamilyID=889482fc-5f56-4a38-b838-de776fd4138c&displaylang=en Scroll down the page a bit to find the download link for the file we need which is WindowsInstaller-KB893803-v2-x86.exe. Download and Install this following the prompts as they appear on your screen. Once it completes click finish and your virtual machine will reboot.
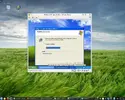
Now, after rebooting go to Start --> Run and type "dxdiag" without the quotation marks and hit enter. This will open the DirectX diagnostic tool. Select no when it asks you for WQHL testing. Take a look at the window and check you version of DirectX. It should be listed towards the bottom of the page.
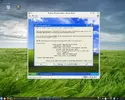
If your version is DirectX 9.0c you are all set. If your version is less you will need to upgrade to 9.0c which can be installed via redistributable here.
Once your DirectX version is up to 9.0c you will need to run a few tests to verify that the guest OS can run d3d from it's end. To do this reopen the dxdiag utility and click on the Display tab at the top once it opens. The window you get should look like this:
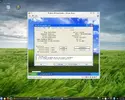
Make sure that DirectDraw Acceleration and Direct3D Acceleration are enabled under DirectX features. Also make sure it says "No problems found" down in the Notes section. This is also a good time to test DirectDraw and Direct3D by clicking on their respective test buttons.
Next with your Internet Explorer open navigate to: http://www.microsoft.com/downloads/details.aspx?FamilyId=333325FD-AE52-4E35-B531-508D977D32A6&displaylang=en This is the download page for .NET Framework 3.5 which is needed to run both Honorbuddy and Gatherbuddy. Click on download and wait for it to install. This will take a little time. You can choose to either Download the program and double click it, or just select Run instead of downloading it and it will begin to install automatically after downloading the set-up files it needs. Approximately 60MB worth.
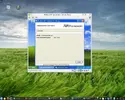
Now comes the fun part. We need to install World of Warcraft onto our virtual machine. You can do this a number of different ways. It works the same as a basic Windows XP install, meaning you can either use the disks and let the patching fun commence, or you can use the PC client installer from Blizzard's website. Or you can migrate a working installation directory from a computer that has one via removable USB drive. I choose the last method because it is the quickest. It still takes around 20+ minutes but it works. No matter how you choose to install WoW just make sure it is installed. It should go off without a hitch.
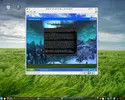
After the WoW client is installed you will need to download and install HB or GB whichever you use, or both if you use them both. Install them as normal. Then start up your WoW client and your Buddy program of choice. You are now Buddying virtualized! You can minimize out of Vmware and use Linux normally. Wow and HB/GB will run just fine in the background, only a button press away should you need to check on them.
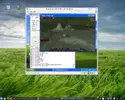
Have fun and make lots of gold! If this tutorial helped you please feel free to tell me so or bump my rep. Any suggestions or recommended additions to this tutorial should be sent to me via PM
Troubleshooting and FAQ:
Q: WoW will not run for me at all! Help!
A: With Vmware Player open and your virtual machine stopped, go to the menu bar and select VM → Settings. Under the Hardware tab select Display and take a look at the options to the right. The box at the very top for 3D Graphics needs to be checked. If this option is grayed out or unavailable then 3D is either not available for your particular video card or you forgot to install Vmware tools.
Q: WoW barely runs on my virtual machine. What do I need to do to make it run better?
A: Well, if upgrading your system is not an immediate option then I recommend setting all your WoW graphics options to their lowest possible setting. Also make sure you are running it in windowed mode and continue to shrink the window until performance improves. Remember that you don't need flawless performance for GB/HB to do it's thing. You just need a good Internet connection and enough RAM to allow the game to run smoothly enough for GB/HB to interact with it.
Q: I thought you said this tutorial was for how to run GB/HB and WoW under Linux, yet I still need to install Windows. What gives?
A: Right now there is not enough support to run GB/HB and WoW natively in Linux. Eventually we'll get there, either with Wine or Mono or a mixture of the two. But given the infrastructure that WoW and GB/HB need to be able to run this is the only way currently to run them under Linux without having to dual boot. If your system can support it then this is the best and only option available for now.
Q: Honorbuddy takes a loooong time to load. Is this normal?
A: Unfortunately, yes it is. Your poor CPU is trying to juggle running your main OS, a virtual OS, WoW with d3d virtualized, and then starting HB on top of all that. It's doing a lot! Have patience, it will load eventually. After the initial load things run much smoother.
Q: My mouse behaves erratically whenever I try to manually change my camera view in game. How do I fix it?
A: As of now, I don't know of any way to change that. It has something to do with how VMware's mouse driver interacts with the host OS. But it is unimportant. The important thing is that HB/GB uses the VMware mouse with no trouble, so automation of your character works just fine. If you're looking to manually play the game then virtualization is not the way to go anyway. For playing the game you should have a copy of WoW installed through wine or another Windows emulator on your Linux OS. This set-up is only to allow GB/HB to do it's thing.
Last edited:


