What's new
  • Visit Rebornbuddy
  • Visit Panda Profiles
  • Visit LLamamMagic
  • Visit Resources
  • Visit Downloads
  • Visit Portal

How to Write a Custom Class, a Guide for Beginners.

CodenameG

New Member
Joined
Jan 15, 2010
Messages
38,364
Reaction score
231
How to Write a Custom Class, a Guide for Beginners.
Last Updated 10-7-10

What is this?
This is a Guide for people looking to get into CC Creation and Honorbuddy Development, this guide will cover basic things like, Creating a project, Adding Refrences to Visual Studio, The HonorBuddy Api, and Do's and Dont's.

Prerequisites
Visual Studio 2010 - Express Edition or Full, Express Edition is Free all you have to do is Register it with Microsoft, and it can be downloaded here

The Custom Class Template (Blank.cs) - Found attached to this post.

Honorbuddy - Latest version - Can be found in the "Releases" section of the fourm.

Good Knowledge of WoW and its Mechanics as well as Class Design

Creating a Project
Assuming you have the above, and you now have visual studio installed, you can now begin creating your project.

Step 1 - Open Visual Studio
you can do this by running the shortcut or though the start menu, (do i really have to explain this?)
Icon.webp
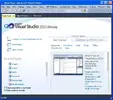
Once you have visual studio open, you should have a screen that looks like this.
Step1-Getting Started.webp
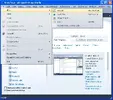
Go to File, New, and then click on Project
Step1-Getting Started 2.webp
from here we should have a screen that looks like this.
on the left side, if windows isnt selected, click on it, then on the right side, click on Class Library, from here we need to enter a name for our project in this case its Warrior, but names like, DbWarlock, Mephiles, Amplify, Kaboomkin. is whats going to define your class later on, so pick a good name from the start.
Step1-Getting Started 3.webp
Welcome to Visual Studio
At this point you can now start working with your project.
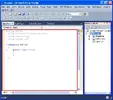
Whats in the Red is your Workspace, This is where you will work with your code.
the Blue is your Solution Explorer, it will be used to switch between files in your project,
if you dont see the Solution Explorer, you can turn it on by going to View, then click on solution explorer
Step1-VSGuide.webp
now we are going to get rid of the default "project file" it created for us
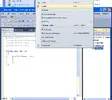
This can be done by clicking on Class1.cs, and pressing delete or Right clicking on it, and then clicking delete.
Step1-GettingStarted 4.webp
Now lets Add in our Template.
We want to right click the project name, (in this case Warrior) then click on Add and then Existing Item. then browse for the template. Blank.cs
Step1-GettingStarted 6.webp
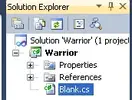
As you can see the file has been added to our current project.
Step1-GettingStarted 7.webp
Now Lets rename Blank.cs
To Rename Click on Blank.cs Twice or Right Click and Click on rename, (its importaint to pick a name thats good, Sugestions are, the Project name, or the Classname, in this case "Warrior", now that that is done click on the file you just renamed again.
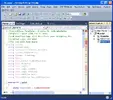
Youll see the code inside the file poped up on the left hand side, we can now make changes.

now as you can see there are lots of different colors here theres Reds and Greens and Oranges.
Now Lets Start with the Greens.
Greens Are comments - Comments are only for the user, and are not read by honorbuddy or visual studio, they are there for you to make notes.

To Make a new comment, go to an empty line and add// before what you want to comment on.
for example,
//This is a new Comment

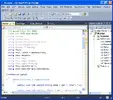
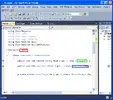
Now lets deal with Reds, Reds are commands that the IDE or the Integrated development environment Aka: Visual Studio dosnt understand, if any code is underlined in red, that means it will not compile, and will NOT run in Honorbuddy. Reds Most of them, will usually be caused by Syantax issues, or in this case not having the proper references.

Step1-GettingStarted 8.webp

Adding the Honorbuddy Refrences To Visual Studio
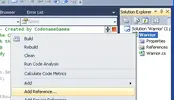
Right click on the Project and then click on "Add Reference..."
Step1-GettingStarted 9.webp
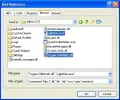
Now Click on the Browse Tab and Explore to your Honorbuddy Directory, once there Click on your Honorbuddy.EXE, and Tripper.Tools.dll you can do it one at a time or Hold Down Ctrl, and Click on Each One to Select them Both at the same time. and then click OK. Repeat this against instead this time under the .NET tab, select PresentationCore and click OK.
Step1-GettingStarted 10.webp
Now if you notice on the left hand side, all the Red Text is now gone, that means we have Successfully added the Honorbuddy Api to visual studio, visual studio can now understand that code.
Step1-GettingStarted 11.webp
Last Step
Now the last thing we need to do is change the NameSpace, the CC Name, and the Class we are Coding for.
now lets deal with these one by one.
Step1-GettingStarted 12.webp
Namespace - helps the project know what code go with what, if we where making a CC with multiple files. they would all need to have the same, Namespace, in order for them to know they where all together. almost like having Bins on a Desk, the Desk is your Namespace, and the Bins are your files. for today's propose we wont go farther.
Change your Namespace to your Project name, in this Case it would be "Warrior" (without the quotes) so we are going to change it from Layout to Warrior.

CC Name - This tells Honorbuddy What to refer to your CC as, for example "Chose Shadow v0.1 as your combat class!" comes up in the log when honorbuddy starts.
Change your CC Name, to your Project name, and then add a version Number, for example V1.0 Please note, this has to be in between the two "" or Visual Studio wont understand it.

Class - The Class, Tells Honorbuddy what "Class" this code is going to work for, and this is the first Api we will be messing with.

Click on the end of WoWClass.Mage
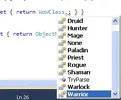
and Backspace out Mage till you get to the end of Class ill you have WoWClass Left, now add a Period . you should see a drop down come up, this is called "Auto Complete" visual studio Went though the Honorbuddy Api, and Pulled out all the Choices for you. now you can ether Type in the Class as it is there, or double click on the option you want.
so if i where doing a shaman, i would click on "Shaman", or type "Shaman" also if you start typing and the list gets down to one or two options, for example i start typing "Sha" if i press Space it will auto complete that code for me. Step1-GettingStarted 13.webp
Congratulations you now have your project completely setup, and ready to start adding code.
 

Attachments

Last edited by a moderator:
Part 2 - NameSpaces, and Code Section breakdowns.

ok so last section when setting up your project i went out of the way to mention the namespace,
its best to think of your name space like the table or desk your working on, and your code as blocks. and as you build/write your code everything in the namespace can easily interact and use your other "blocks" in order to complete tasks.


Honorbuddy CC Code Sections

Honorbuddy has several code sections that Must be in your CustomClass in order for it to work.

these sections are:

Rest()
NeedRest()
Pull()
PullBuffs()
NeedPullBuffs()
PreCombatBuffs()
NeedPreCombatBuffs()
CombatBuff()
NeedCombatBuffs()
Heal()
NeedHeal()
HandleFalling()
and Combat()

Ok so as you look at the list you might notice something, some of these sections are built in pairs. the Most Obvious Example is Rest() and NeedRest().

So Whats the Difference Between the two and why do we need them both?
When honorbuddy is Running, its Constantly Checking the Code in NeedRest, so if NeedRest() Returns True. Honorbuddy will then Run the Code in Rest(), and precede to Execute your code. In almost all cases You'll Want your Need / Action Sections to Match.
For Example
Code:
        public override bool NeedRest
        {
            get
            {
                if (Me.HealthPercent <= 50)
                {
                    return true;
                }
                else
                    return false;
            }
        }

        public override void Rest()
        {
            if (Me.HealthPercent <= 50)
            {
                Styx.Logic.Common.Rest.Feed();
            }

        }
Whats this code is doing is honorbuddy is constantly going to check NeedRest, if my HealthPercent Is Less or Equals 50
Then Return True, Meaning we Do Need to execute Rest()

In Rest we have the same If My HealthPercent is Less then or equals 50, then We have
Styx.Logic.Common.Rest.Feed();
this Tells Honorbuddy to stop and eat whatever food the person put into the Food name: setting in Honorbuddy,
The HonorBuddy Api has lots of these Predefined Blocks to Assist you in writing your code.

DataTypes and Variables.
Variables can be Broken down into 3 main types.
Bool's - Can Ether be True or False
Int's - Any Number 1, 5, 9888.
String's - any Text such as "Fireball"

Then we have a few more used by Honorbuddy / WoW, a Few Examples of these are
WoWitem
WoWLocation
WoWSpell
WoWClass

As you can see all of them start with wow, and are not directly compatible to the Earlier explained Bool's, Strings, or Int's

Code:
        public override bool NeedRest
        {
            get
            {
                if (Me.HealthPercent <= 50)
                {
                    return true;
                }
                else
                    return false;
            }
        }
As We can see NeedRest is a Bool and returns True when Me.HealthPercent equals an Integer, in this case 50. to use an if, you have to compare 2 variables of the same type against each other. so Integers to Integers, Strings to Strings, and WoWItems to WoWItems.

Earlyer when setting up the project i pointed out
Code:
public override WoWClass Class { get { return WoWClass.Mage; } }
this is an example of how to use The WoWClass Datatype Properly.

So the above code basicly tells honorbuddy What Class its suppose to be used on, and also somewhere inside honorbuddy theres a check like this
Code:
if (Me.Class == WoWClass.Mage)
{
Compile and use this CC
}
however if your running a check like this, theres another way it can be written.
Code:
if(Me.Class.[COLOR=red]ToString()[/COLOR] == "Mage")
{
Your Code here
}
as you can tell, what we did here was instead of comparing Me.Class to its datatype WoW.Class we Converted Me.Class to a String. then compared the String to another String. while they will both work its recommended only to convert data types only if you know what its going to be, or else your running on a wild goose chase.

so you might be asking. What if i wanna Compare 2 Sets of things, and if they are true then execute my code?
Code:
if([COLOR=red]Me.Class[/COLOR] == [COLOR=red]WoWClass.Mage[/COLOR] [COLOR=blue]&&[/COLOR] [COLOR=red]Me.Level[/COLOR] == [COLOR=red]10[/COLOR])

if([COLOR=red]Me.Class[/COLOR] == [COLOR=red]WoWClass.Mage[/COLOR] [COLOR=blue]||[/COLOR] [COLOR=red]Me.Class[/COLOR] == [COLOR=red]WoWClass.Paladin[/COLOR])

if ([U][COLOR=blue][COLOR=lime]([/COLOR][COLOR=red]Me.Class[/COLOR] == [COLOR=red]WoWClass.Mage[/COLOR] && [COLOR=red]Me.Level[/COLOR] == [COLOR=red]10[/COLOR][COLOR=lime])[/COLOR][/COLOR][/U] [COLOR=blue]||[/COLOR] [COLOR=blue][COLOR=darkorchid]([/COLOR][COLOR=red]Me.Class[/COLOR] == [COLOR=red]WoWClass.Paladin [/COLOR]&& [COLOR=red]Me.Level[/COLOR] == [COLOR=red]10[/COLOR][COLOR=darkorchid])[/COLOR][/COLOR])
ok so in the first example. we are going, Ok if My Class is Mage And My Level is 10 if both of these are true, then it will execute whats inside of the if.

in example 2, if My Class is Mage OR MyClass is Paladin

in example 3, If My Class is Mage And My Level is 10 OR My Class is Paladin And My Level is 10
Its Worth Noting in Example 3 that whats in the Green () and the Purple () Are Whats getting Compared, so Whats underlined, and What inst underlined Are acting like Groups, Comparing the First half to the Second. this way we can do as many comparisons if that we want without messing things up.

Wrapping Bool's and Void's
so In C# we can "Wrap" Commonly Used Functions in order make our code modular, but also make our lives easier.
so lets build at a SpellCasting Wrapper.
Code:
        public void CastMeUp(string [COLOR=blue]SpellName[/COLOR])
        {

        }
so we start by creating a new void. voids are like actions and dont have to return anything, bools can also create actions, but have to return something true or false.

at this point its importaint to note in the CastMeUp Method, we have declared a new Variable, A string named SpellName these varibles are only used and accessible inside of this Method/Void unless Passed Elsewhere.
Code:
        public void CastMeUp(string [COLOR=blue]SpellName[/COLOR])
        {
            if ([COLOR=magenta]SpellManager[/COLOR].[COLOR=purple]CanCast[/COLOR]([COLOR=blue]SpellName[/COLOR]))
            {
                [COLOR=magenta]SpellManager[/COLOR].[COLOR=purple]Cast[/COLOR]([COLOR=blue]SpellName[/COLOR]);
            }

        }
so in the now Completed CastMeUp Method, we are first Running an if and calling the SpellManager. the SpellManager is handles all spell casting. and will be used to deal with just about everything spell related.
so If we can Cast SpellName (is a bool and checks things like if the spell is on cooldown and if you have the spell learned. if it returns true, the spell is ready to be cast.)
Then Cast Spell SpellName the spell will attempt to cast at this point, if it able to, the spell should proceed if not you may end up with a Red Text Error in wow. such as "Spell Isnt Ready yet" or "You are too far Away"

Now if we want to call our newly created Method/Void it would be done like this.
Code:
        public override void Combat()
        {

            CastMeUp("FireBall");

        }
Making Wrapers not only makes out code Cleaner, but makes it easy to Call Multiple Checks with one command. as youll see later on, the honorbuddy Api has lots of methods we can call and use the same way.

Pull And Combat
The Pull and Combat Parts of the CC are the most important. Honorbuddy walks around looking for mobs once it find a mob, it targets the mob, then Runs Pull()
Pull() Is Responsible for Getting in range of the mob, and starting combat. so if your coding a melee class, that involes getting in Melee Range and Attacking the Mob.
after that Combat() is Called

Combat() is Responsible for all Spell casting, and has your rotation in order to kill the mob as Well as Staying in Range of the mob, or getting into position. its important to note that while combat is running NeedRest() is not checked, While NeedCombatBuffs() and NeedHeal() Is Checked.

At this Point its important to note how the code is run. honorbuddy executes code in "pulses". Meaning that its going to Call Combat(), and once Combat() is finished it will Keep "Pulsing" or Running Combat() so when writing code its important to keep in mind that you want your code to take as lest time as possible to process in order to get good performance out of it.


Navigator and WoWmovement.
ok so now that we know how to cast spells make methods. and basic if's now we take a look at getting our toon where we need it.

so what do we do if out toon isnt in range of the mob we are trying to attack?
Simple, somewhere in Combat() and Pull() we want to make a check to make sure we are in range. now we can ether make copy and paste this code for moving into range, into both the Pull and Combat Sections or we can Make a Method. to call just call the predefined code we need. to make things nice and clean lets me a simple method for moving into range.
Code:
        public void RangeCheck()
        {
            if (Me.CurrentTarget != null)
            {
                if (Me.CurrentTarget.Distance > 30)
                {
                    
                }
            }
        }
ok so we first do a check that I have a current target, (null is a way of expressing that a value has Nothing in it) its important to check for nulls, or else your code will get stuck trying to do something it cant.
then we have a check for if my current target's distance is more then 30. the distance is the raw distance between you and the target.
at this point we have a few options for how we want to move to the mob.
We can Use Navigator, and the Mesh System to make a path to the mob and move in range.
or We can use click to move and right click the location of the mob to move our toon into range. the problem with click to move is that if theres a log or something between you and the mob, you wont be able unstuck yourself.
Code:
            [COLOR=green]WoWPoint[/COLOR] [COLOR=blue]Location[/COLOR] = new [COLOR=blue]WoWPoint(123,456,789);[/COLOR]
Code:
[COLOR=red][COLOR=black][COLOR=red][COLOR=black][COLOR=red][COLOR=black]            [COLOR=magenta]Navigator.[/COLOR]MoveTo(Me.CurrentTarget.[COLOR=blue]Location[/COLOR]);[/COLOR][/COLOR][/COLOR][/COLOR][/COLOR][/COLOR]
[COLOR=red][COLOR=black][COLOR=red][COLOR=black][COLOR=red][COLOR=black]            WoWMovement.ClickToMove([COLOR=blue]Location[/COLOR]);
[/COLOR][/COLOR][/COLOR][/COLOR][/COLOR][/COLOR]

ok so here we have a couple of examples.
first we have a manualy defined WoWPoint. its not very often youll have to manualy define a wavepoint, but thats how you do it if you need to.
then we have an example of how you would call Navigator to Move to a My CurrentTargets Location.
and Finaly we have an example of How We would use ClickToMove. to Go to a WoWPoint.

its importing to note, that there is no difference in Location, and Me.CurrentTarget.Location, as Both are WoWPoints. even though they both have different X,Y,Z Coordinates.


so at this point you might be asking yourself (ok thats how i move to a mobs location, but what if i want to get within 10 yards of the mob?)
Code:
            Navigator.MoveTo(Me.CurrentTarget.Location, [COLOR=blue]10[/COLOR]);
            WoWMovement.ClickToMove(Me.CurrentTarget.Location, [COLOR=blue]10[/COLOR]);
ok so as you can see we have something new added the ,10tells the interal method for Navigator and ClicktoMove to find a point between Me and the CurrentTarget, thats 10 Yards away from the CurrentTarget.
so finally Lets build out Method so we can Can do this easily based on what we are doing.
Code:
        public void RangeCheck()
        {
            if (Me.CurrentTarget != null)
            {
                if (Me.CurrentTarget.Distance > 30 && !Me.IsMoving)
                {
                    Navigator.MoveTo(Me.CurrentTarget.Location, 29);
                }
            }
        }
ok so now every-time we call RangeCheck(); if My CurrentTarget Distance is Greater then 30, and im not moving. Then move to 29 yards. (the perfect range for frostbolt)

but what if we wanted to make this code more modular? since there will be times where we may need to get closer then 29 yards.
Code:
        public void RangeCheck(int [COLOR=blue]MobDistance[/COLOR], int [COLOR=red]MyDistance[/COLOR])
        {
            if (Me.CurrentTarget != null)
            {
                if (Me.CurrentTarget.Distance > [COLOR=blue]MobDistance[/COLOR] && !Me.IsMoving)
                {
                    Navigator.MoveTo(Me.CurrentTarget.Location, [COLOR=red]MyDistance[/COLOR]);
                }
            }
        }
so what we basically did was add some variables so we can call this code with whatever values we want, so we an reuse the code in a variety of situations.
so if we wanted to make the check like before we would call it.
RangeCheck(30, 29);
or say we wanted to get in melee range. instead of changing the entire method we would just call it.
RangeCheck(5,4);

So Now our Final Combat() Should look something like this.
Code:
        public override void Combat()
        {
           [/COLOR][/COLOR][/COLOR][/COLOR][/COLOR][/COLOR][/COLOR][/COLOR][COLOR=red][COLOR=black][COLOR=red][COLOR=black][COLOR=red][COLOR=black]RangeCheck([COLOR=blue]30[/COLOR], [COLOR=red]29[/COLOR]);[/COLOR][/COLOR][/COLOR][/COLOR][/COLOR][/COLOR]
[COLOR=red][COLOR=black][COLOR=red][COLOR=black][COLOR=blue][COLOR=black][COLOR=blue][COLOR=black]             CastMeUp("FireBall");
        
        }
[/COLOR][/COLOR][/COLOR][/COLOR][/COLOR][/COLOR][/COLOR][/COLOR]
so get within 29 yards.
then Cast Fireball.

this should get you well on your way to making CustomClasses and Plugins.
 
Last edited:
HonorbuddySettings Helper.

Ok, so this section will over how to implement and use the Honorbuddy Settings helper to easily manage Saving and Loading Settings.

Step 1. Creating a new CS File

in the solution explorer, right click the project name, and go to Add, New Item.
SH1.webp

From there we are going to select Class, and give it a name, Instead of ProjectNameSettings, i suggest you replace ProjectName, with the name of your project. and have Settings at the end of the file name, so you can find it easy.
SH2.webp

Once thats created, it will automaticly open up the new file you created.
Code:
using System;
using System.Collections.Generic;
using System.Linq;
using System.Text;

namespace MrItemRemover
{
    class ProjectNameSettings
    {
    }
}

the important thing to notice is that the namespace NEEDS to match the one in your main CC, or else when honorbuddy compiles the project its not going to know that they go together, and the whole thing wont work.

ok so now that we have the settings.cs file setup, heres the code we are going to use. just replace it with what was auto generated by visual studio
Code:
using System.IO;
using Styx;
using Styx.Helpers;

namespace MrItemRemover
{
    public class MIRsettings : Settings
    {
        public static readonly MIRsettings Instance = new MIRsettings();

        public MIRsettings()
            : base(Path.Combine(Logging.ApplicationPath, string.Format(@"Plugins/MrItemRemover/MrImageRemover-Settings-{0}.xml", StyxWoW.Me.Name)))
        {
        }

        [Setting, DefaultValue(false)]
        public bool GrayItems { get; set; }

    }
}

above is the settings file for MrItemRemover. again make sure you change the namespace, and you change every instance of MIRsettings to the file name of your settings file, for example, on Amplify instead of
Code:
public class MIRsettings : Settings
its
Code:
public class AmplifySettings : Settings

once you have those changed go ahead and save and compile your project, and if theres no errors your good to go.

Code:
        public MIRsettings()
            : base(Path.Combine(Logging.ApplicationPath, string.Format(@"[COLOR=red]Plugins/MrItemRemover/MrImageRemover-Settings-{0}.xml[/COLOR]", StyxWoW.Me.Name)))
        {
        }

[COLOR=blue]        [Setting, DefaultValue(false)]
        public bool GrayItems { get; set; }[/COLOR]
ok so in the red we have our output directory, this is where the settings file will be created and loaded and saved from, so its important this output directory matches what your doing, in this case, since this is a plugin, it goes out to the plugin directory where it saves, for a custom class, you'll want to change the output directory to CustomClasses/Config
Code:
"CustomClasses/Config/Amplify-Settings-{0}.xml"
just change Amplify to your project name.

now the blue is actually your default settings, these not only defined what settings you have, but uses the defaults when creating the settings file so lets break it down,

Code:
        [Setting, [COLOR=blue]DefaultValue(40)[/COLOR]]
        public [COLOR=purple]int[/COLOR] [COLOR=seagreen]RestHealthPercentage[/COLOR] { get; set; }
so in the blue, we have our default value, since this example is an integer, its going to be a number, if its a string, you'll wanna have the string name in there.
Code:
[Setting, DefaultValue("Auto")]

in the purple we have our variable type, i shouldn't have to explain this at this point, but int, string, bool, are going to be the most used.

and finally in the green we have our the name of our setting/variable its pretty self explanatory

if you have multiple settings, just add more entry's.

Code:
        [Setting, DefaultValue(40)]
        public int RestHealthPercentage { get; set; }

        [Setting, DefaultValue(40)]
        public int RestManaPercentage { get; set; }
        //0 for auto, 1 for Molten, 2 for Frost, 3 for Mage
        [Setting, DefaultValue("Auto")]
        public string ArmorSelect { get; set; }

        [Setting, DefaultValue(false)]
        public bool Use_Wand { get; set; }

        [Setting, DefaultValue(false)]
        public bool FrostElemental { get; set; }
and of course you can add //comments, if you need to annotate what your doing.


Using your settings.


to use a setting, in place of the verable in your code, replace it with
Code:
[COLOR=red]AmplifySettings[/COLOR].Instance.[COLOR=blue]Use_ManaGems[/COLOR]
in the red you have your project name / Class name
and in the blue we have our setting name / Variable

in addition to accessing the data we have in our settings file this way, there are a few more options that you'll commonly use.

Code:
AmplifySettings.Instance.Save();
AmplifySettings.Instance.Load();
as you may of guessed,
.Save() Saves your settings out to the file defined, and
.Load() Loads your settings from the file.

that should be just about everything you need to know about using the settings helper class to save load, and use settings.
 
Last edited:
Champion.

Apparently you cannot be described in one word.

God.
 
epic dude. i'm not that big of a programmer myself :P but i'm quite sure someone will be able to make MUCH use of this :)
 
epic dude. i'm not that big of a programmer myself :P but i'm quite sure someone will be able to make MUCH use of this :)
my hope is that everyone will be able to use this, that guy that just needs his mage to run up to mobs and spam arcane explosion, or the guy that needs to make his warrior use bandges, or the the noobie who come in and decides, hey, i can do this class, better, and does it. thats how i started, i started leveling my mage, and thought, "i could do this better" and i did, now, if i knew how to use visual stuido back then, instead of making my edits in note pad i would of been much better off, but still.
 
hey ! Khryptor is written in notepad++ :D
 
LEGENDARY!

EPIC!

Because one word was not enough.
 
Awesome i can't wait to see this guide finished!
 
Or, maybe...

Nice guide CnG,

About time someone taught us how to write a propper CC,

What design aproach are you taking with this, very modular or something else ?
 
Last edited:
really nice work, thanks for this. i've been tinkering with all the cc's for a while, and wanting to make one of my own.
 
If someone would comment their CC's well enough i'm sure a lot more people could create their own.
 
hey codename! really love your guide..i'm kinda interested in plugins.. ;) pls? :DDD ty!
 
Are you going to include how to add spells and other stuff?
 
Very impressive. Makes me wonna start out slow to make my own CC :)
 
Try taking a look at other CC's. That what I did for my hunter class!

Yeah i tried doing this it would be a lot more useful if the CC's were commented and told what each part does, it doesn't even have to be very descriptive.
 
Yeah i tried doing this it would be a lot more useful if the CC's were commented and told what each part does, it doesn't even have to be very descriptive.

Try taking a look at my hunter CC, it's based on the default cc, but it's fairly obvious what does what. It's all regioned etc
 
Nice guide, i'm not much of a programmer. Actually I've never written anything, but I want to give it a try.
 
Back
Top